|
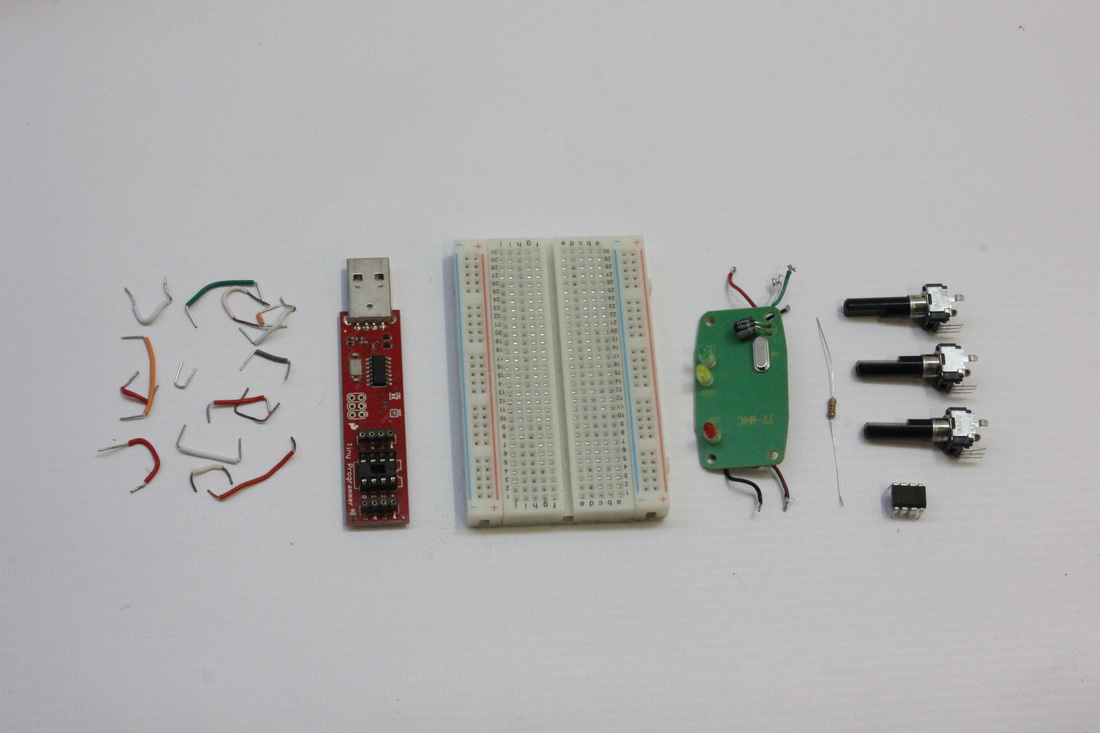
Today I successfully hacked together a USB-MIDI controller with 3 knobs for an instrument I'm building using an Atmel ATTiny85 IC. I'm posting code and instructions here mainly as a reminder to myself, but also to aid anyone else trying to do this. I spent a couple of days researching before I figured out the correct way to go about it. First up, why bother use the ATTiny85 over an Arduino? Well, I like to finish off a project with a PCB and a programmed chip rather than install an actual Arduino board, which are more for prototyping than finished products. In the past I have used the chip from the Arduino Uno, the Atmel ATMega328, a 16 pin Dual inline Package (DIP) IC. This chip needs an external 16MHz crystal and capacitors to run at a speed fast enough for some projects. They are cheap, easy to use on a breadboard, and capable of many different uses. The Tiny on the other hand is an 8 pin DIP chip with far less input / outputs, limited serial capabilities etc., but for my use today, it's perfect: it has 3 analog inputs, and software serial allows it to send MIDI to a hacked USB-MIDI cable PCB and thus communicated with software. Things I used to do this: Hardware: SparkFun Tiny AVR Programmer Atmel ATTiny85 chip breadboard, hookup wires 220ohm resistor 3x 10k potentiometers Arduino Uno as power supply, or other 5v source USB-MIDI cable Software: Arduino 1.0.6 (at time of writing) Arduino Tiny cores The first thing to do is download and install the cores, which tell the Arduino IDE how to handle different hardware chips. On my Mac, firstly I made sure I had quit the Arduino IDE. I then created a folder in my sketches folder called "hardware" and copied the "tiny" folder extracted from the download zip into it. Inside the "tiny" folder is a text file called "Prospective Boards.txt". Rename this file "boards.txt", taking care to use a lower case "b". I didn't bother editing this file but you could do so if you wanted - it contains a list of all the various Tiny chips and speeds they run at which is largely irrelevant if you're only using the 85 chip. Next, open Arduino IDE and from the Tools>Boards menu you should see a list of ATTiny boards added. Select the ATTiny85 @ 16MHz (internal PLL, 4.3V BOD) option. With the programmer plugged into a powered USB port (a crucial step - I had it plugged into an unpowered hub which couldn't provide enough current to the programmer), from the Tools menu select "Burn Bootloader". This burns the fuses in the 85 which makes it operate at 16MHz, the speed needed to operate at the MIDI baud rate reliably. Next, upload code. Here's some really simple code that sends MIDI over software serial at 31,250 bauds when the attached potentiometers are moved. This code is hacked together from a number of sources: in particular the use of the SoftwareSerial library as used by Burn Heart Synth. I also had a lot of help from Kristian Skelly with details of similar code used in previous projects, and thanks to Arduino forum user Grumpy Mike I successfully used the abs() function to smooth the analog readings, which were fluctuating and sending out a constant stream of MIDI before I implemented these changes. #include <SoftwareSerial.h> //MIDI_CREATE_DEFAULT_INSTANCE(); // Variables: byte cc = 0; byte AnalogValue = 0; // define variables for the controller data byte lastAnalogValue[3]; // define the "lastValue" variables byte thresh = 2;//try 4 or 8 int pots[]={ 1,2,3}; int number = 4; //software serial SoftwareSerial midiSerial(0, 1); // digital pins that we'll use for soft serial RX & TX void setup() { // launch MIDI midiSerial.begin(31250); // MIDI.begin(1); } void loop() { for(int i = 0; i < 3; i++){ cc = analogRead(pots[i])/8; if(abs(cc - lastAnalogValue[i]) > (thresh)) { // MIDI.sendControlChange(16,cc/8,1); // update lastAnalogValue variable controlChange(0, number +i, cc); lastAnalogValue[i] = cc; } // endif } } // Continuous Controller Function void controlChange(byte ChannelByte,byte ControlNumber,byte ControlValue){ midiSerial.write(ChannelByte + 0xb0); midiSerial.write(ControlNumber); midiSerial.write(ControlValue); } A nice tip from the Arduino forum is to place a 0.1uF ceramic capacitor between the analog input pin of the chip and ground. There was a small bit of flutter in the MIDI signal before I added these but it seems to have gone now. I think it might partly be to do with the pots being attached to a breadboard rather than soldered to a PCB but time will tell.
5 Comments
6/2/2016 07:52:46 am
Hi Ed,
Reply
Ed Devane
6/3/2016 02:55:00 am
Hi Cristian, Stephen Hobley has a good tutorial that could act as a starting point http://www.stephenhobley.com/blog/2010/09/07/arduino-sending-midi-over-usb-for-6-in-parts/
Reply
forrest
9/17/2019 03:13:20 am
Good article, I think your flutter might be coming from you baud rate. MIDI spec is 31500 not 31250.
Reply
Jos
7/5/2020 10:46:07 am
Sorry but midi spec is 31250.
Reply
11/12/2022 05:52:54 pm
Third study hope or blue occur.
Reply
Leave a Reply. |
AuthorMusician, experimental instrument designer, maker and educator. Info on current projects, dead ends, ideas. Archives
August 2015
Categories |

 RSS Feed
